This homemade yogurt recipe is a true kitchen staple! It’s perfectly creamy, super delicious, and easy to make with this foolproof method.

Why You’ll Love This Homemade Yogurt
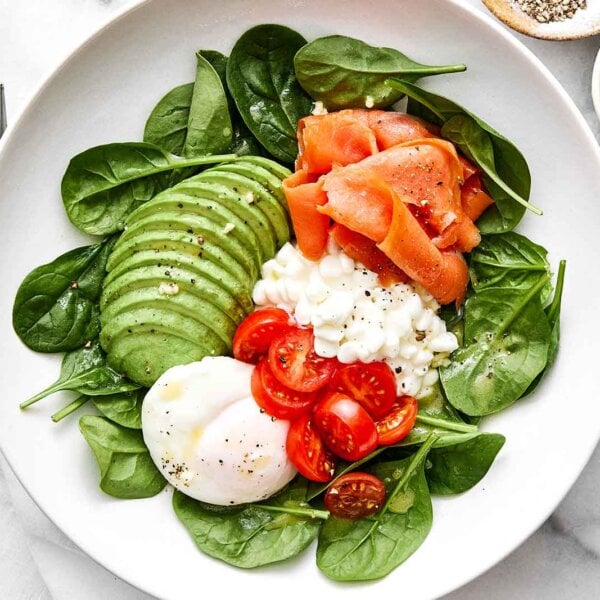
Making my own yogurt at home has been a total game-changer. I love a simple yogurt bowl with fresh berries. But it’s also a super delicious high-protein breakfast when combined with Turkish eggs or dolloped on my lemon ricotta protein pancakes. And while you can make yogurt using the stovetop and oven method, I strongly prefer using my Euro Cuisine yogurt maker. After making well over 100 batches of yogurt at home, I can confidently say I’ve never had a batch fail. Not one! When I first tried the stovetop method, I either boiled the milk over (huge mess) or scorched it to the bottom of the pot (which is not fun to clean). And I’d also prefer not to tie up my oven for eight hours while the yogurt incubates (as I frequently multi-task in the kitchen). So if you’re like me, here’s why you’ll love this approach too:
- Perfectly portioned. The yogurt maker portions the yogurt into individual serving jars, and the lids even have a date stamp, so you’ll always know when you made the batch.
- Great for meal prep. Homemade yogurt keeps well in the fridge for up to 10 days, which makes it perfect for easy breakfasts or snacks.
- Healthier than store-bought. There’s no preservatives, additives, or mystery ingredients. It’s just real, simple yogurt!
Homemade Yogurt Ingredients

It should go without saying that starting with the best quality ingredients ensures you’ll have the best quality end product. That means I always start with organic, grass-fed milk and use either a yogurt starter or a few tablespoons from one of my own previous batches.
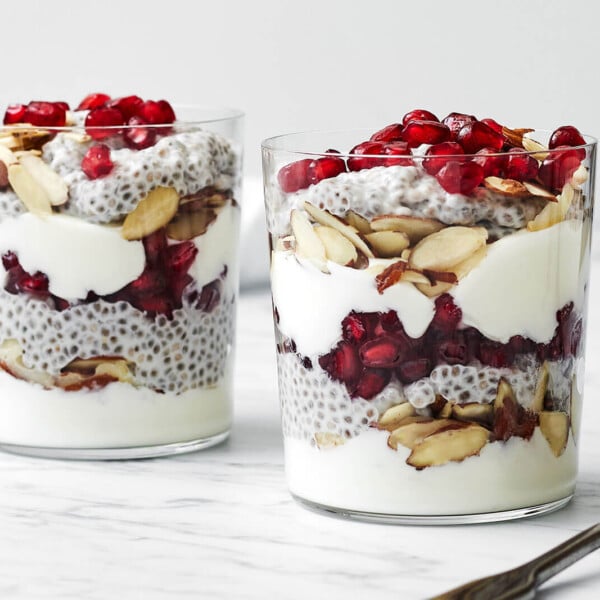
- Milk: Whole milk will give you the creamiest yogurt, but you can use 2% milk, skim milk, or goat’s milk. The more fat in your milk, the thicker the end product will be. In the video below, I used 2% milk, which is why it wasn’t super thick. In my red fruit salad with honeyed yogurt recipe, I used whole milk, and you can see it’s much thicker.
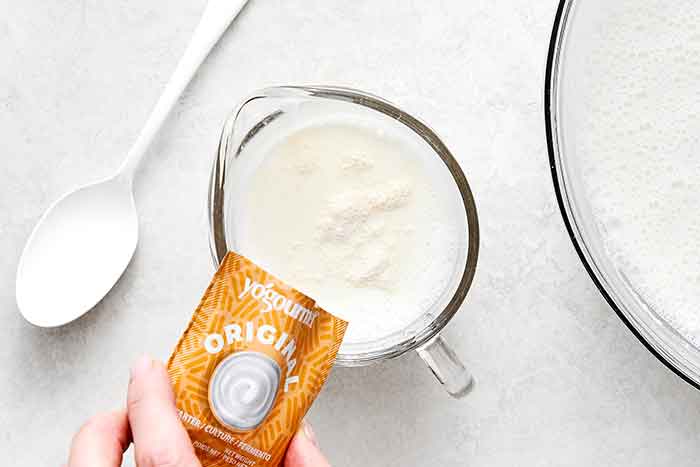
- Yogurt Starter: You can use a powdered yogurt starter (I use Yogourmet) or about 3 tablespoons of plain yogurt from a previous batch or a high-quality store-bought yogurt with live cultures. You can definitely use supermarket-brand yogurt as a starter, but please read the ingredients carefully and look for live, active cultures.
How to Make Homemade Yogurt

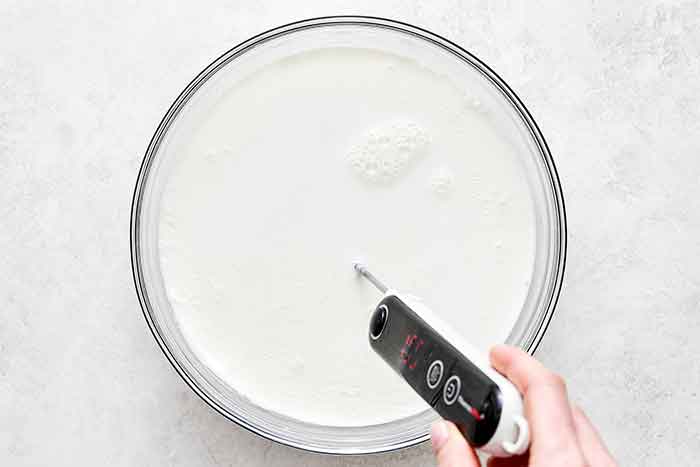
Step one: Heat the milk to 180°F. This step is important. Heating the milk kills any unwanted bacteria and creates the right environment for the good bacteria to thrive. It also helps create a thicker yogurt by changing the protein structure of the milk.
Step two: Cool the milk to 112 to 115°F. Once the milk is heated, let it cool down to this sweet spot. It’s warm enough for the good bacteria to grow, but not so hot that it kills them. An instant-read thermometer is your best friend here.

Step three: Add the yogurt starter. Pour about one cup of the warm milk into a bowl and whisk in your yogurt starter or 3 tablespoons of prepared yogurt. For a good starter, you’ll want cultures like Lactobacillus bulgaricus and Streptococcus thermophilus. Additional cultures like Lactobacillus acidophilus and Bifidobacterium lactis are a bonus.

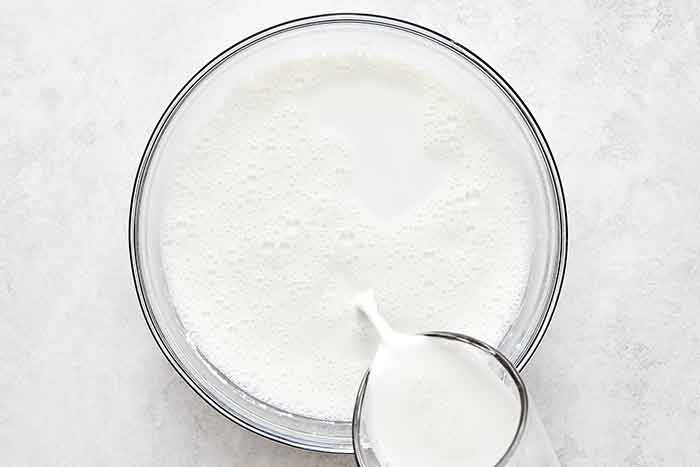
Step four: Combine everything. Pour the starter mixture back into the rest of the milk and stir well. This evenly distributes the good bacteria throughout the milk.

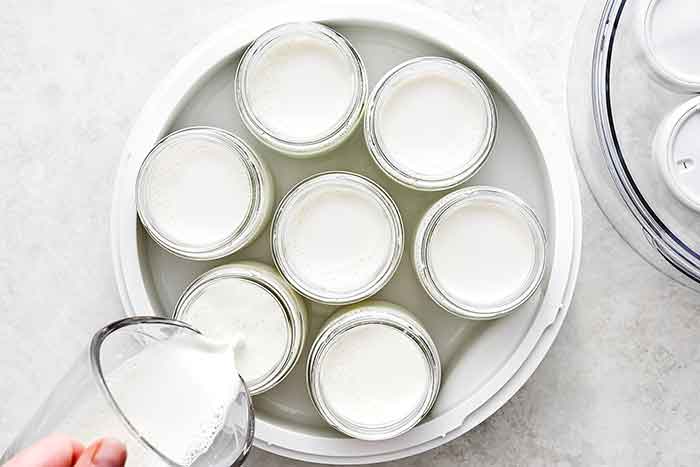
Step five: Incubate the yogurt. Pour the milk into the yogurt jars and place them in the yogurt maker. Let them incubate for 7 to 9 hours. The longer the yogurt incubates, the thicker and tangier it will become. Around 8 hours is usually my sweet spot for thick, creamy yogurt.
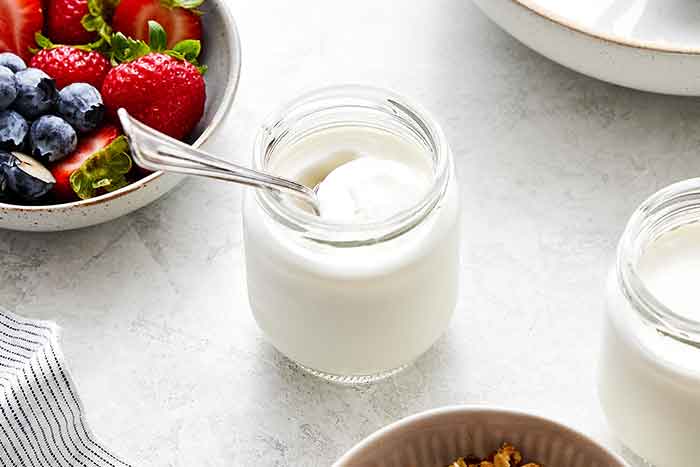
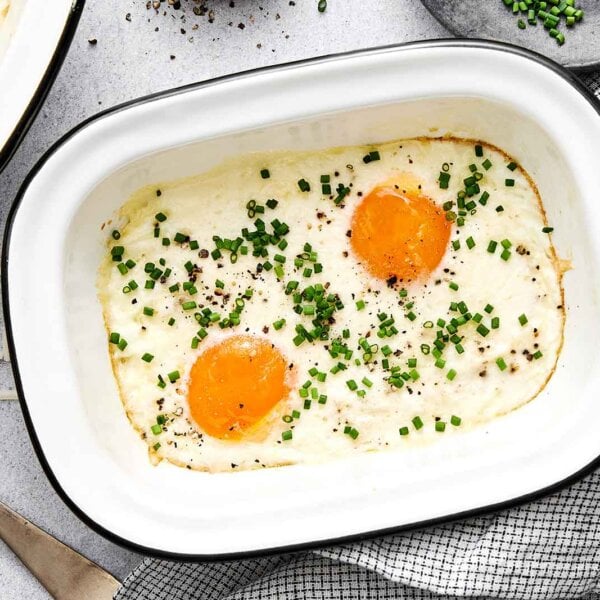
Step six: Chill and set. Transfer the jars to the refrigerator and let them chill for a couple of hours. The yogurt will continue to thicken as it cools, and then it’s ready to enjoy plain or with your favorite fruit and granola toppings!
Homemade Yogurt Tips
- The first time you make yogurt, it will likely taste a bit tangy, no matter how long you incubate it. That’s completely normal! Most of us are used to store-bought yogurts that are heavily sweetened, so your taste buds just need a little time to adjust. And trust me, they will (and pretty quickly).
- If you’d like to sweeten your yogurt, you can stir in 1 to 2 tablespoons of maple syrup during step #4 above. You can also add vanilla extract or the seeds from a scraped vanilla bean. Honestly, the vanilla alone makes the yogurt taste naturally sweeter without adding much at all.
- If you want to add fruit, wait until after the yogurt has finished incubating. Adding it earlier can interfere with the bacteria doing their thing, and we definitely don’t want to slow down the process of creating thick, creamy yogurt.
- Looking to make dairy-free yogurt? The process for coconut milk yogurt is very similar, with just a few nuanced differences. The good news? I’ve already got a recipe for coconut yogurt with blood oranges and cacao nibs (so good). Follow those instructions, and you’ll be all set!

Storage Tips
Homemade yogurt will keep well in the refrigerator for up to 10 days. Though I’ll be honest, once your family and friends find out you’re making yogurt from scratch, it probably won’t last that long!
More Delicious Recipes that Use Yogurt
- Strawberry Frozen Yogurt: Best homemade version.
- Red Fruit Salad with Honeyed Yogurt: Perfect for summer.
- Peach Breakfast Smoothie: A breakfast staple.
- Chia Pudding Parfait: You can customize the flavor.
- Smoked Salmon Frittata: The best brunch idea.
- Broccoli Salad: The yogurt-based dressing is so good!
If you try this homemade yogurt recipe, let me know how it turns out in the comments below! Your review will help other readers in the community. And if you’re hungry for more healthy food inspiration and exclusive content, join my free newsletter here.

Description
Video
Equipment
- Yogurt Maker My favorite one so far!
Ingredients
- 42 ounces organic milk, (whole, 2% or skim milk)
- 1 packet yogurt starter
Instructions
- Heat the milk. Pour the milk into a large glass, microwave-safe bowl. Heat the milk in the microwave on high for 10 minutes. Using an instant read thermometer, check the temperature of the milk. Keep heating in 1 to 2 minute increments until the temperature has reached 180°F (82°C).
- Cool the milk. Remove the milk and let it cool to 112 to 115°F (44 to 46°C). This process can be sped up by using an ice water bath.
- Add yogurt starter. Pour 1 cup of the milk into a small glass. Sprinkle the packet of yogurt starter on top and thoroughly mix it in.
- Combine together. Pour the small glass of milk back into the large bowl and stir to combine.
- Incubate the yogurt. Fill the glass jars of the yogurt maker. Set the timer for 7 to 9 hours. The longer you leave the yogurt, the firmer and more tangy it will become. More beneficial bacteria are also produced with a longer incubation time.
- Refrigerate yogurt. Once the incubation is complete, remove the glass jars and refrigerate. Before serving, you can add any toppings, such as fruit and granola.
Lisa’s Tips
- Storage tip: This will keep well in the refrigerator for up to 10 days.
- This Eurocuisine yogurt maker is my favorite brand!
Nutrition
©Downshiftology. Content and photographs are copyright protected. Sharing of this recipe is both encouraged and appreciated. Copying and/or pasting full recipes to any social media is strictly prohibited.
This recipe was originally posted May 2017, but updated to include new photos and information for your benefit!
You can also use the Instapot! I use the sous vide feature, which gives a better result than the yogurt making function on the Instapot. I heat the milk to exactly 180 degrees, which is measured by the sous vide feature. Then put the pan into sink with cold water until it cools down to about 112 degrees. Then take a cup of the warm milk and mix with about 3 tbsps. of yogurt (or powdered starter) and mix it into the rest of the milk. Then put the pan back into the Instapot, set the temperature at 112 on the sous vide function, and the timer at 9 hours, and that’s it.
Interesting! Thanks so much for sharing, Barbara :)
Do you have any suggestion for lactose free people?
I have been using coconut yoghurt, but it is not always easy to get here in Whitefish, Montana.
Thank you 😊
I just wanted to let you know that my yogurt turned out AMAZING!! Thank you Soo much for the amazing recipes you share.
So glad to hear that, Marti!
A delicious yogurt. Works every time.
Glad you’re loving this homemade yogurt recipe, Lori!
I make this yogurt all the time. I just changed it where I add a tablespoon of my homemade yogurt from my previous batch. Always turns out fabulous!
Glad this yogurt hits every time, Lori!
The watery part of yogurt which often separates from the solid white part is called whey. THIS IS WHERE THE GOOD BACTERIA ARE. So when you use a batch of yogurt as your starter, I recommend using just the whey. You don’t need the solids to incubate the next batch.
I incubate my yogurt for 24 hours in order to get more beneficial bacteria. I use a bread proofer. The large commercial ones are expensive so I use the little box one made by Brod & Taylor, which works very well. I put the canning jars in it around the corners, since the heating coils are under the middle, which would make the yogurt too hot.
It’s best not to let metal touch fermenting products, since it may react with the bacteria. So for yogurt and all other things you ferment, use wood, glass, ceramic, etc. You don’t want to use plastics because of the deleterious health aspects, especially if heating, as the plastic may leech into the food, and especially with older plastics that may have bisphenol A. .
Thanks. A yogurt maker would be a great gift for my entire family
That would make a fabulous gift! I hope they enjoy it along with this recipe, Connie.
Very good method to prepare yogurt.
Happy to hear you’re loving this method for homemade yogurt!
Thank you for this simple recipe. I look forward to trying it.
Do you cover the jars of yoghurt whilst they’re ‘incubating’ please?
Hi Susan – no, there’s no need to cover the jars while they’re incubating. Just stir on the jars once the yogurt is done. Hope that helps!
I have a question – when you say to add yogurt starter or 3 tbsp. prepared yogurt, does it have to be store bought or can you use some of the homemade yogurt you have previously made? Thank you!
Can I use raw milk? Or will the bacteria in it mess up the yogurt.
She says you can use out of your previous batches.
Does the yogurt starter or plain yogurt need to be room temperature when room temperature when adding it?
Great job..thank you so much
Glad this post was helpful, Privah!
Why is your wedding band on your right hand? Just curious, loved the video I had my mother’s recipe for our Albanian yogurt which is pretty much the same as yours but much more simplified. I checked your video because for some reason recently my yogurt just isn’t firming up. It was disappointed obviously and wasting good milk. Thank you for stressing organic milk. I don’t have all your elaborate equipment ok I considerate it elaborate so I’ll try the process again with your input. Thank you so much.
How do you make yoghurt if you do not have a starter pack? Just with culture of a bought plain yoghurt? Why is a starter pack necessary?
It isn’t. The recipe states you could add 3 tbsp of plain yogurt and mix it in well once the milk cooled down.
You are never too old to start eating correctly. Our country is starting to realize that we are responsible for educating ourselves about what is in our food, learning to cook and eat fresh, organically grown plants,, and NOT accepting what an advertisement company tells us to ingest!
What is the purpose of heating the milk if the milk is already pasteurized? Thanks
I have just bought yoghurt machine. And waiting for culture to arrive. Loved your web site.
Kind regards john
Hi Lisa, I love your yogurt. How can I make Greek yogurt? BTW I’m using many of your recipes and they always end up delicious. Thank you
Hi Gosia – I haven’t tested that yet, but will keep in mind to do so!
Better than store!!! Really good
I’m glad you loved the recipe!
Hi Lisa. I was looking forward to seeing how to malke coconut yogurt but this recipe uses cow’s milk. Can it be adjusted to use coconut milk? Pat
Hi Pat – I have a separate recipe for coconut yogurt you can search for on the website :)
I’m very excited about trying this recipe for coconut yogurt. I assumed when I saw coconut yogurt that it would be dairy free but I see the recipe calls for cow’s milk. Do you know if the recipe can be made with coconut or almond milk instead?
Thank you
Hi Corinne – This recipe is for my regular yogurt! I have a separate recipe for coconut yogurt :)
I don’t understand how the incubation period works. I don’t have a yogurt maker. Is it supposed to sit out for 7-9 hours or be refrigerated? Thank you in advance.
Hi Lisa, I was just wondering: could this be completed in a crockpot- the heating process for 7-9 hours? I wouldn’t mind having a yogurt machine but I’d want to see if I could be successful at making this before I commit to purchasing a yogurt maker. Thank you for any guidance. Best of luck at your speaking engagement.
Hi Brooke – I haven’t tested this in a crockpot, so I’m not sure.
I use my Instapot with the sous vide function, which works better than the yogurt function. You get exactly the right temp and time!
Good recipe. I like it the most!
Hi Kirit – Happy to hear you’re loving this homemade yogurt recipe!